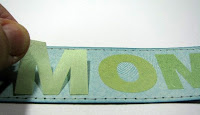
Judy and I thought we'd share a quick Mother's Day card lesson. Have fun!

To complete this project you will need a cardstock weight double sided pattern piece measuring 4.5x12, a matching pattern or cardstock strip measuring 1.5x6, letter rub ons or stickers, word embellishment, 4.5" matching ribbon, flower, brad, matching ink, fine tip pen, pin or paper piercer, piece of cork or cushy mat and adhesive.

Fold the 4.5 x 12 piece in half. Ink all the edges of both patterned pieces.

Pierce holes approximately 1/8" apart around the outer edges of the 1.5x6 strip.

Lightly draw lines between the holes with the fine tip pen. This is a great technique to create faux stitches. You'd think it was real stitching from a sewing machine! (I was taught this great technique from my good friend Cherie! Thanks, Cherie!)

Spell out the word "Mom" with the rub ons or stickers placed on the far right of the strip.

Adhere the strip to the card approximately 3/4" from the bottom.

Adhere the ribbon approximately 1.5" from the left side.

Adhere the word embellisment centered on the ribbon and the "Mom" strip.

Add a brad to the center of the flower. Lightly ink the tips of the petals. (Please don't mind my ink pad. It's been well used. Hehe)

VOILA!...Your Mother's Day card is complete. You have to write your own sentiments on the inside but, I'm sure you can handle that.
Below is a pic of another card I made using the same format but using different paper. It's amazing how it completely changes the look.

Enjoy making your cards!
Happy Mom's Day everyone!!!


No comments:
Post a Comment